Create Buttons
Overview
Are your customers bored of typing in a small window in the campaigns they receive? Twixor EnCap's loaded button feature which comes built-in in the Actionable Instant Messaging will enable them to choose what they want to do. For example take a case where you are requesting payment from your customers for the service provided by you. If you send a message regarding payment, they have to sign in into third party website and make the payment. This is an indirect and time consuming process.
In order to solve this issue to an extent, Twixor EnCaps allows you to embed a button in the messages you send. In the above mentioned case of requesting payments, when your customers press this transaction enabled button "Pay", the device will perform a logical operation related to payment as programmed within the button inside a EnCap. The forms associated with the buttons will be enforced instantly.
Configuring Buttons
Here we'll create the buttons required for the EnCap Forms.
Perform the steps below to create a loaded and actionable button for use in forms.
1. Select an EnCap to which you want to create and configure the button. For example, select the BookStore EnCap created by us.
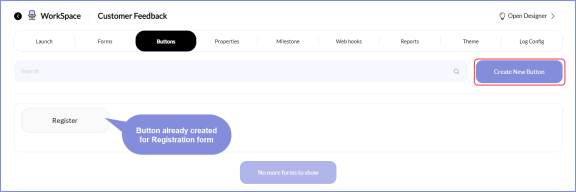
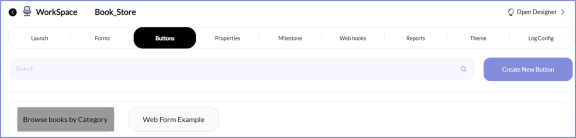
2. Click Buttons tab. This will open the list of the buttons used in the selected EnCap "Book Store".
3. Click Create New Button to create a new button for the chosen EnCap.
Create a New Button
Creation of a new button involves the following steps:
1. After clicking the Create New Button option, enter an identity for the button in Name.
Let us give a name for the button as Browse Book by Genre
2. Provide an unique description for the button in Identifier.
Warning! The button identifier should be at least 1 to 25 characters and must start with an alphabet

3. Select the type of the button from Type.
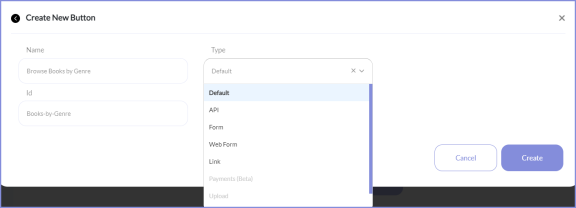
The button type and its characterization available in the current version is enlisted in the table below:
| Button Type | Description |
| Default | Button to go to the next page |
| API | Button to make API calls |
| Form | Button for opening Forms created in Twixor EnCaps |
| Web Form | Button to open external web form |
| Link | Button to load the URL |
Creating different types of button involves different types of configurations:
Default Button
The default button type is Default. Click Default option if you want to use Next button for navigating to the next page in the campaign flow.
API type Button
Selecting API button allows you to call an API when you click it.
If you want your button to call an API, you have to first connect the API to a data source. Follow these steps to connect the API to Appiyo or Web hook data source.
To know the ways to hook either Appiyo or other URL, you should read our guide on Web-hook Configurations.
Data-sources refer to any system that can provide or receive data required for a workflow.
To connect to an Appiyo Data source
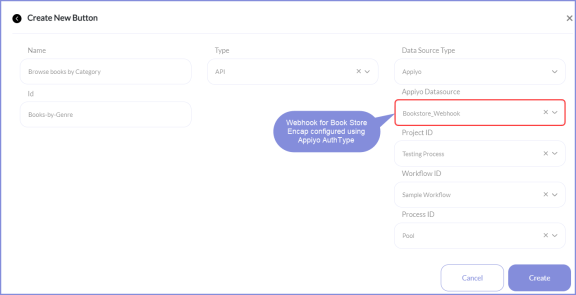
If you select the Datasource Type as Appiyo, follow these steps:
- The datasource name can be selected from Appiyo Datasource.
- Project Id denotes the identification for the selected project where the work flow for the button (in Twixor EnCaps) is defined in Appiyo.
- Select the unique work flow id for the button under the chosen project from Workflow Id.
- Choose the action executed when the button is clicked for the selected workflow from Process Id.
Note! The button action (process) will be defined in the Script task within the pool.
For example if you want to use Appiyo Datasource for Book Store EnCap, select the Datasource Type as Appiyo. The option to select the Appiyo Data source will be enabled automatically. For Book Store EnCap, we have configured a webhook called BookStore_Webhook1 using Appiyo.
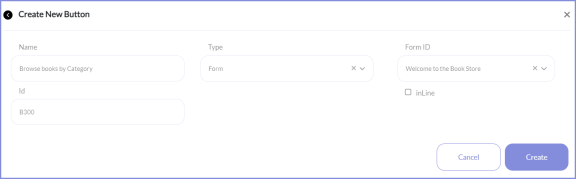
Form Button Type to open EnCap Forms
Select Form to choose the forms designed using Twixor EnCaps and enter the Id of the form to be executed in Form Id.
- If you want the form to be displayed within the same page, enable Is Inline option.
Web Form Button
Click Web Form type to open an external Web Form or HTML form within the EnCap.
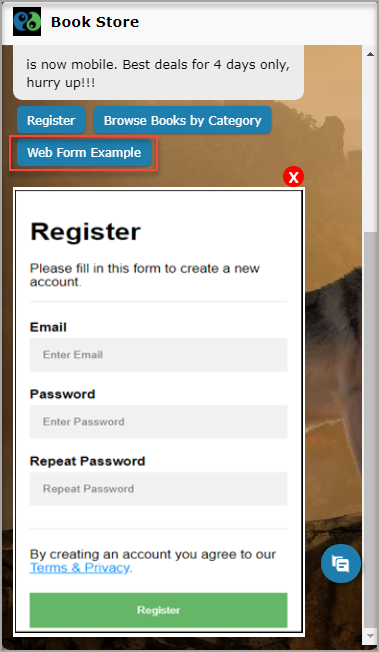
For example, let's call an external Web Form that can be used to register a new customer.
To do so, provide the URL to fetch the web form in Web Form URL and Height of the web form as given below:

In this example, we've used the HTML to open the registration webform.
When you click this Web Form Example button we created here, the EnCap output will look like:
4. Finally click Save to create a new button or Cancel to demolish the button creation process. Browse Books by Category button is created and displayed on the list as shown below.
5. In similar manner, create Pay and Provide Payment Details buttons for the Book Store EnCap to enable payment.
6. You can also edit and delete the selected button configuration by clicking  ->
->  .
.
7. Search the buttons by entering its name in Search field.
